Introduction
This is a guide to using Aamks.
About Aamks (from https://aamks.szach.in/?node=about):
“Aamks is an open source, web-based platform for assessing the fire safety of humans in buildings. Aamks runs hundreds of fire simulations (CFAST) and evacuation simulations (Aamks.Evac) and then evaluates the results. In each simulation humans are moving across the building and are affected by fire and smoke.”
Video tutorials of Aamks and other material is available at https://www.youtube.com/channel/UCKhHI32-1TQL6AKQ4IdDRLg/videos
Prerequisites
Aamks user interface is web-based. Currently, the only supported web browser for the interface is Google Chrome. The Aamks user interface requires the experimental features of Chrome to be enabled. To do this, copy and paste the following to your address bar:
chrome://flags/#enable-experimental-web-platform-features
and hit Enter. You will see the following view:
![]()
Change the setting from “Disabled” to “Enabled” and restart Chrome.
Aamks registering and login
Open the Aamks web page using either the server’s public IP or DNS name:
This is the main login page. To create a new user, click register:
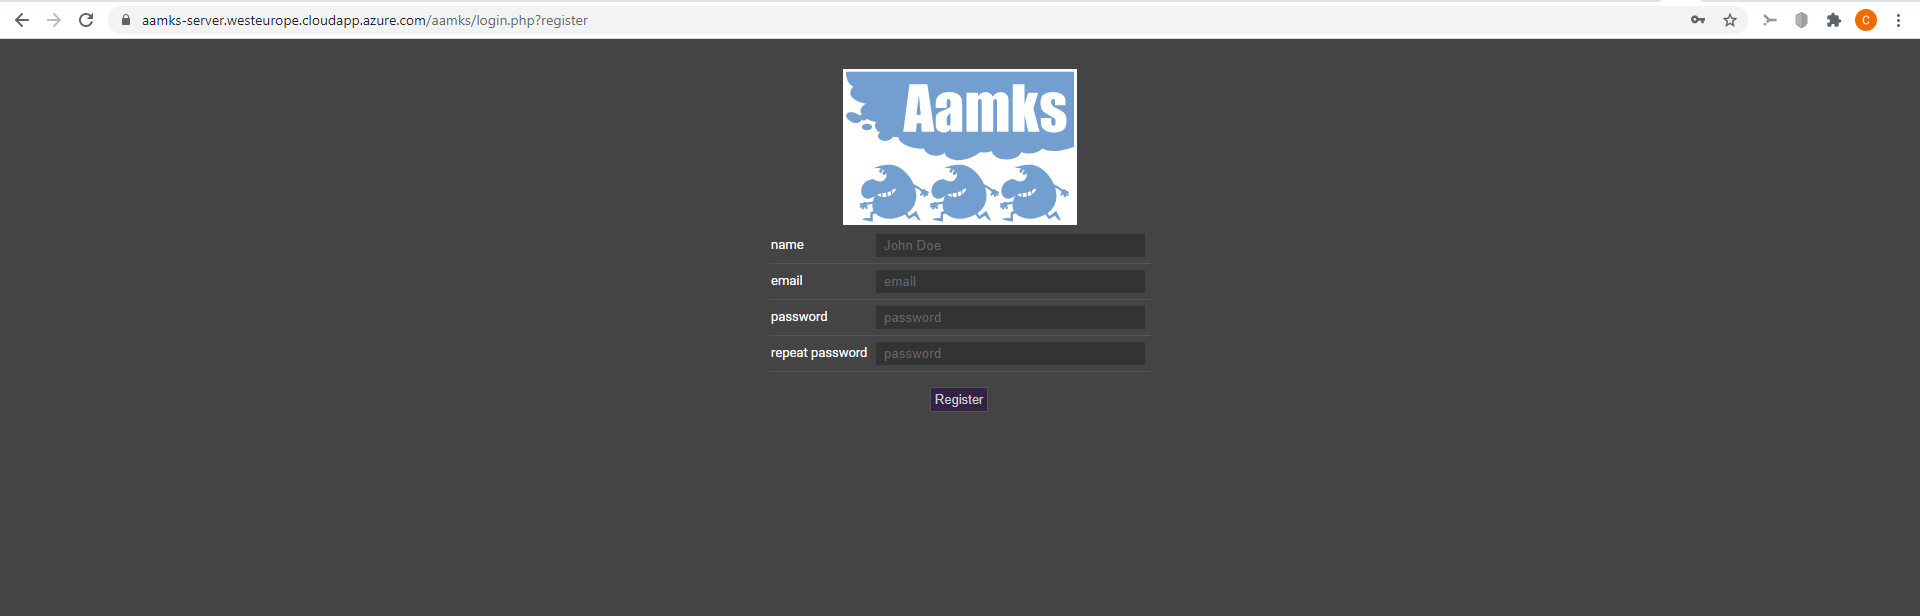
Enter your name, an e-mail address and a password and click register. You will be logged in and taken to the Aamks main page:
Creating a new project
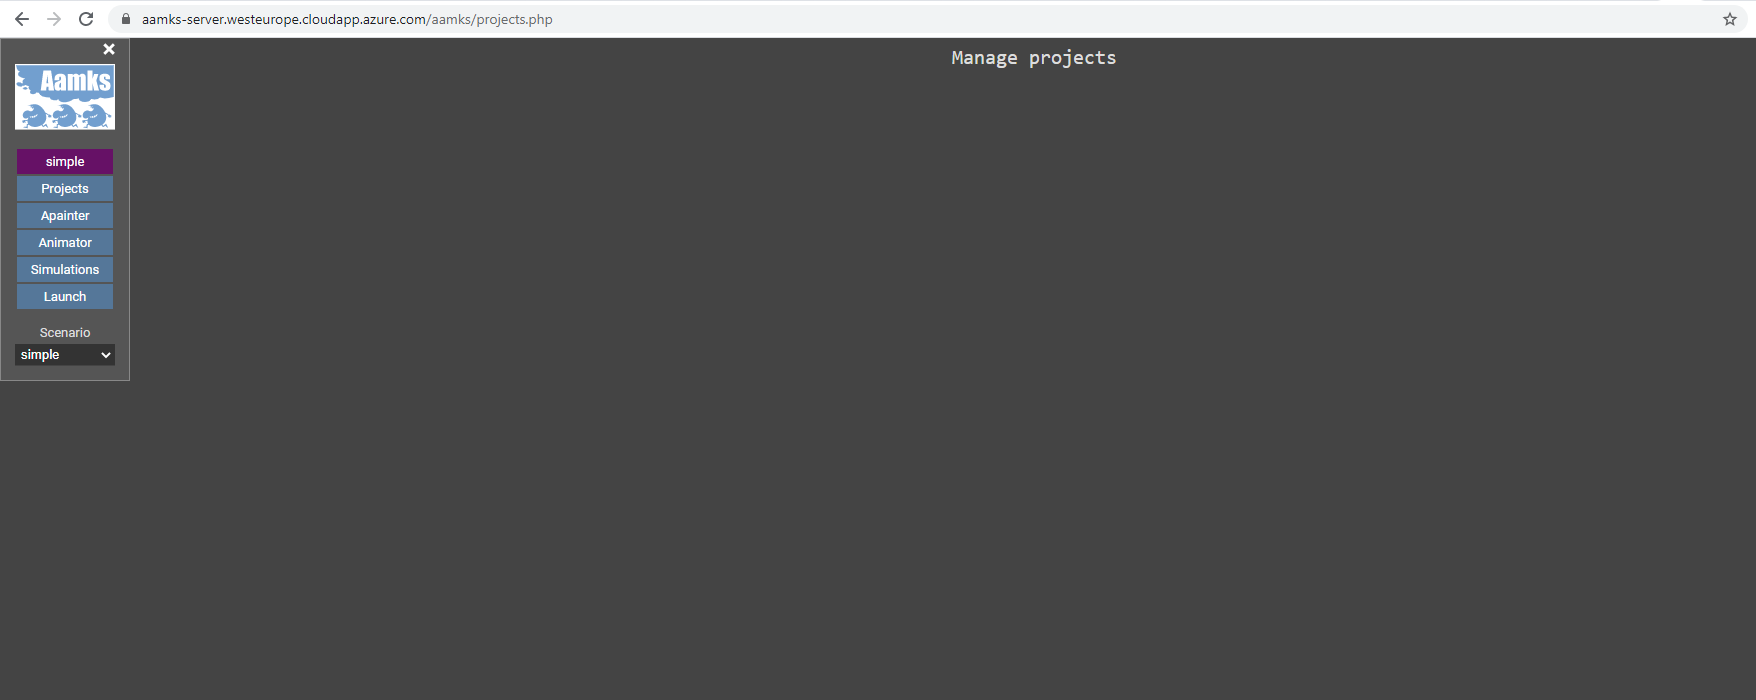
On the left-hand side is the menu for Aamks. Click “Projects”.

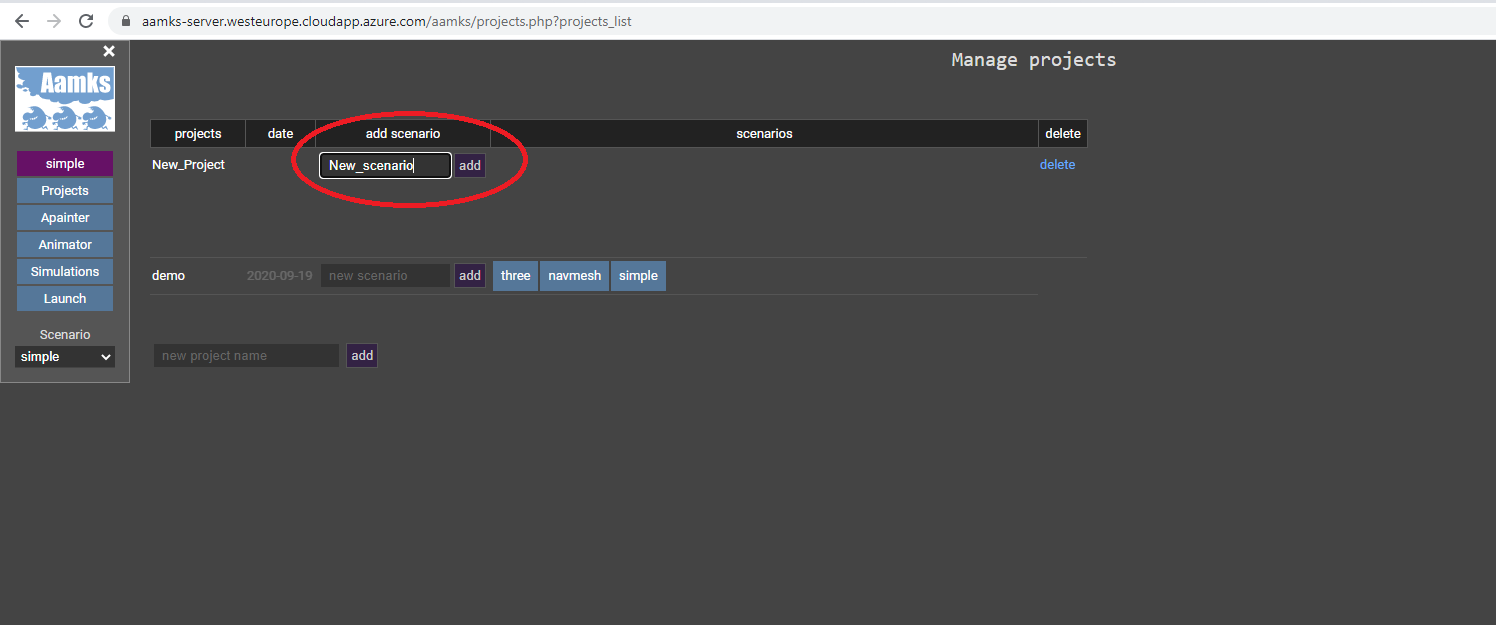
This is the project view. The demo project is currently the only one visible. To add a new project, enter a name for the project in the circled field and click “add”:
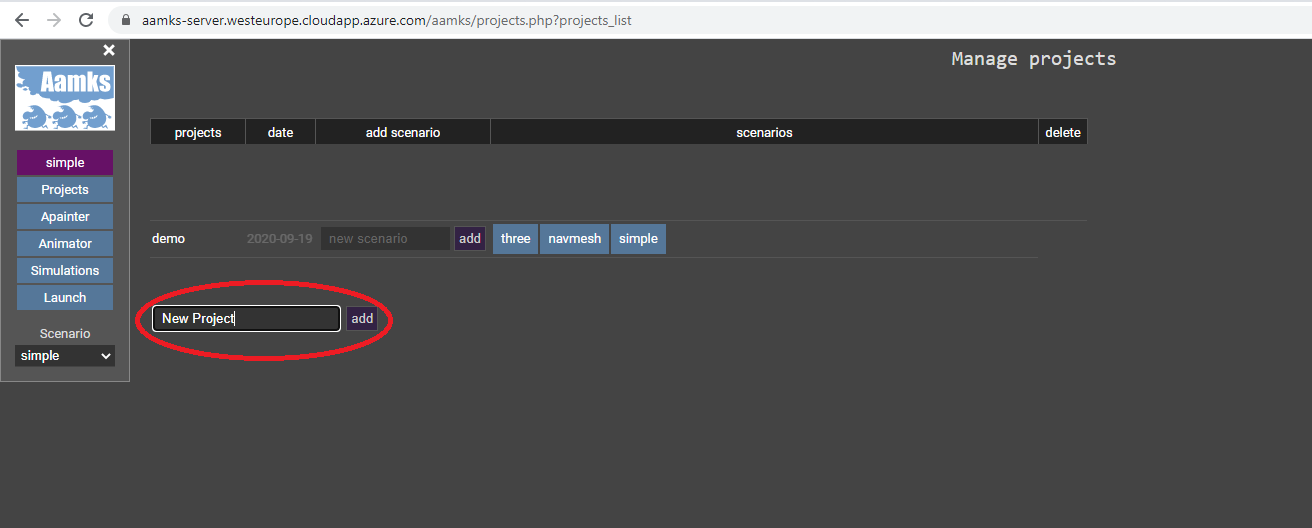
The new project is now visible. To add a scenario to the project, enter a name in the highlighted field and click “add”:
You will then be taken to the Apainter view where the geometry for the scenario is made:
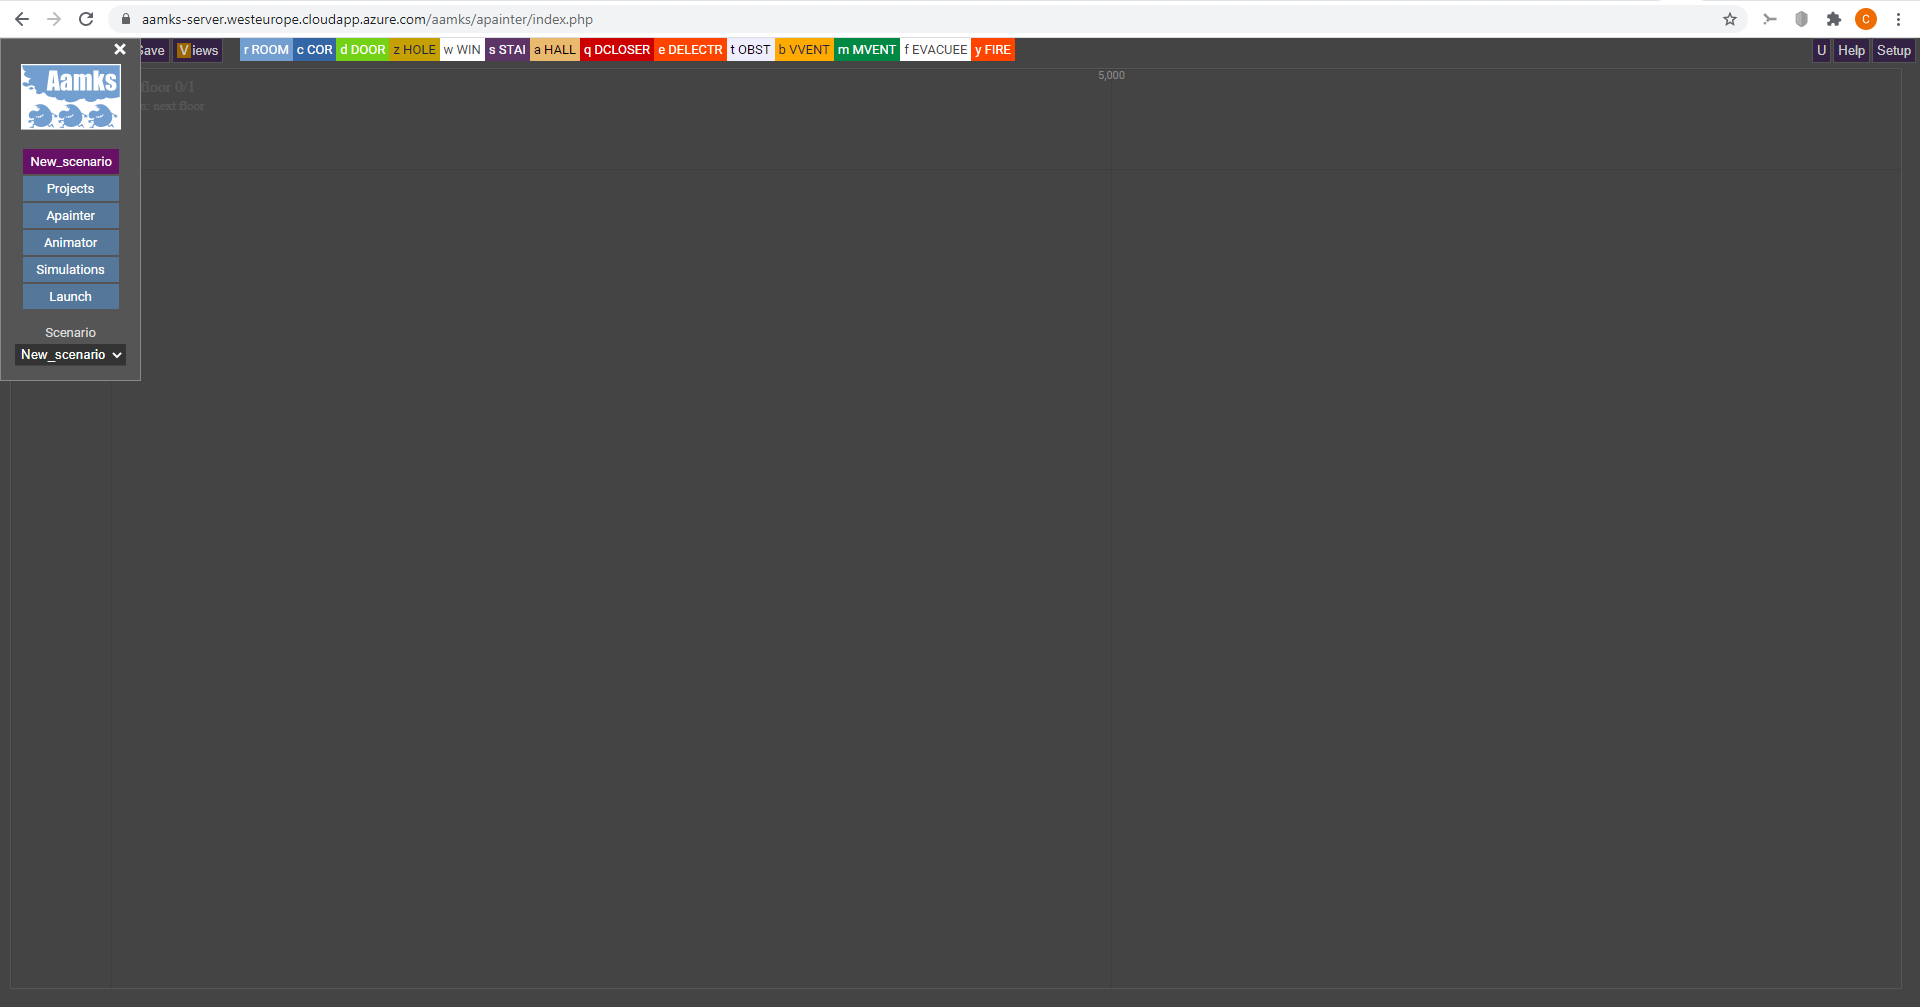
The ribbon in the upper part of the view shows the elements which can be added.
NOTE: if the ribbon is not visible, you may need to disable the network cache in Chrome. To do this, press F12 and click the “Network” tab:
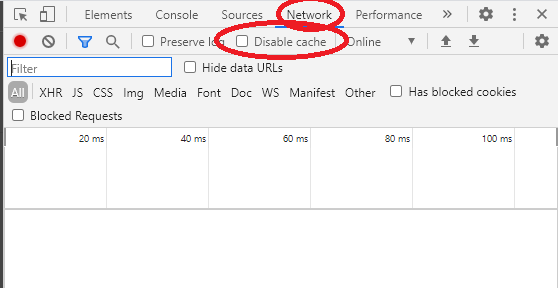
In the tab, check the “Disable cache” box and reload the page with ctrl+r. The ribbon should now be visible.
Using Apainter to make a geometry
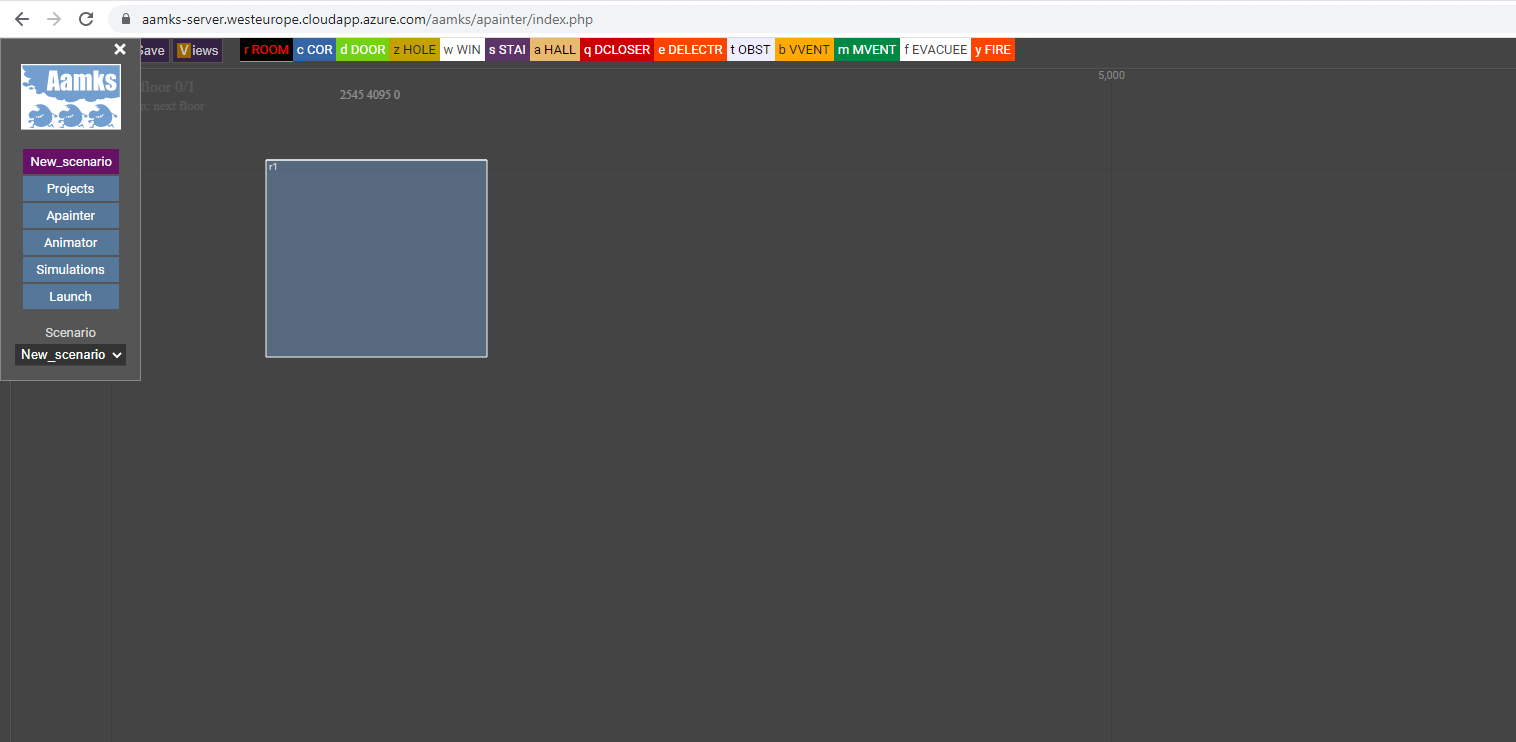
Apainter dimensions are in centimeters. To add elements to the simulation, either click the relevant type in the ribbon, or press the quick-select key shown in the ribbon (e.g. press “r” for ROOM).
Let’s make a simple geometry in Apainter. Select the room element by clicking on “r ROOM” or by pressing the “r” key on your keyboard. Add the room to the simulation by selecting a point on the screen. Press and hold left mouse button at the selected point, then move the cursor until the element is of suitable size and let go of the mouse button:
Next, we’ll add a corridor. Select the corridor element by clicking “c CORR” or by pressing “c” on your keyboard. If you move the cursor near the room, you’ll notice it snaps on to the corners and sides of the room. Select a corner, then press and hold the left mouse button, then move the cursor until the corridor is of a suitable size and let go of the mouse button:
When drawing the geometry, you can zoom in/out in Apainter by scrolling with your mousewheel, and you can drag the view by pressing and holding the middle mouse button (typically integrated with the mouse wheel). Original zoom can be restored with “=” (in Nordic keyboard layouts shift+0).
By pressing “v” or clicking on “Views” you can change the perspective between 2D and 3D:
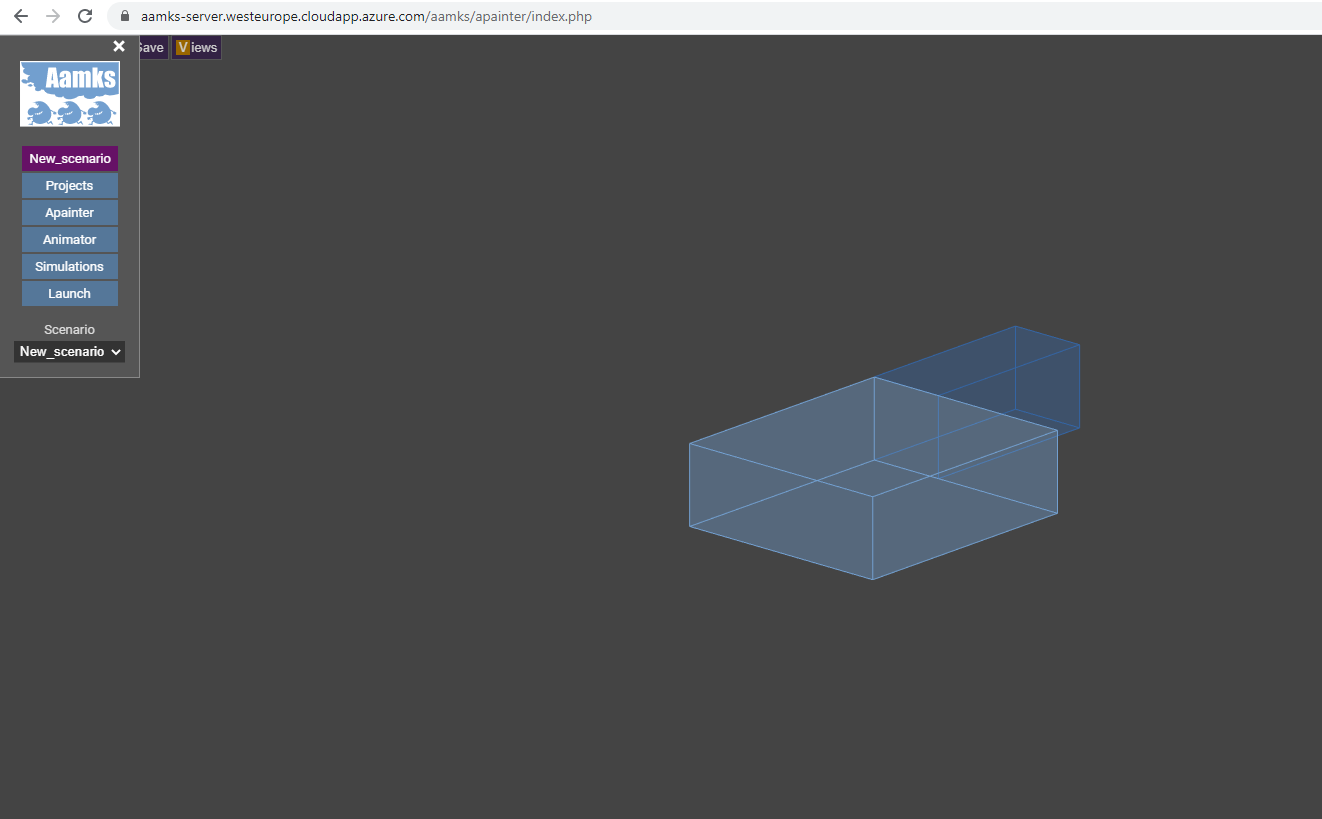
You can rotate the view in 3D by clicking and holding the left mouse button. To zoom in or out, scroll with your mouse wheel. Press “v” to get back to the 2D view.
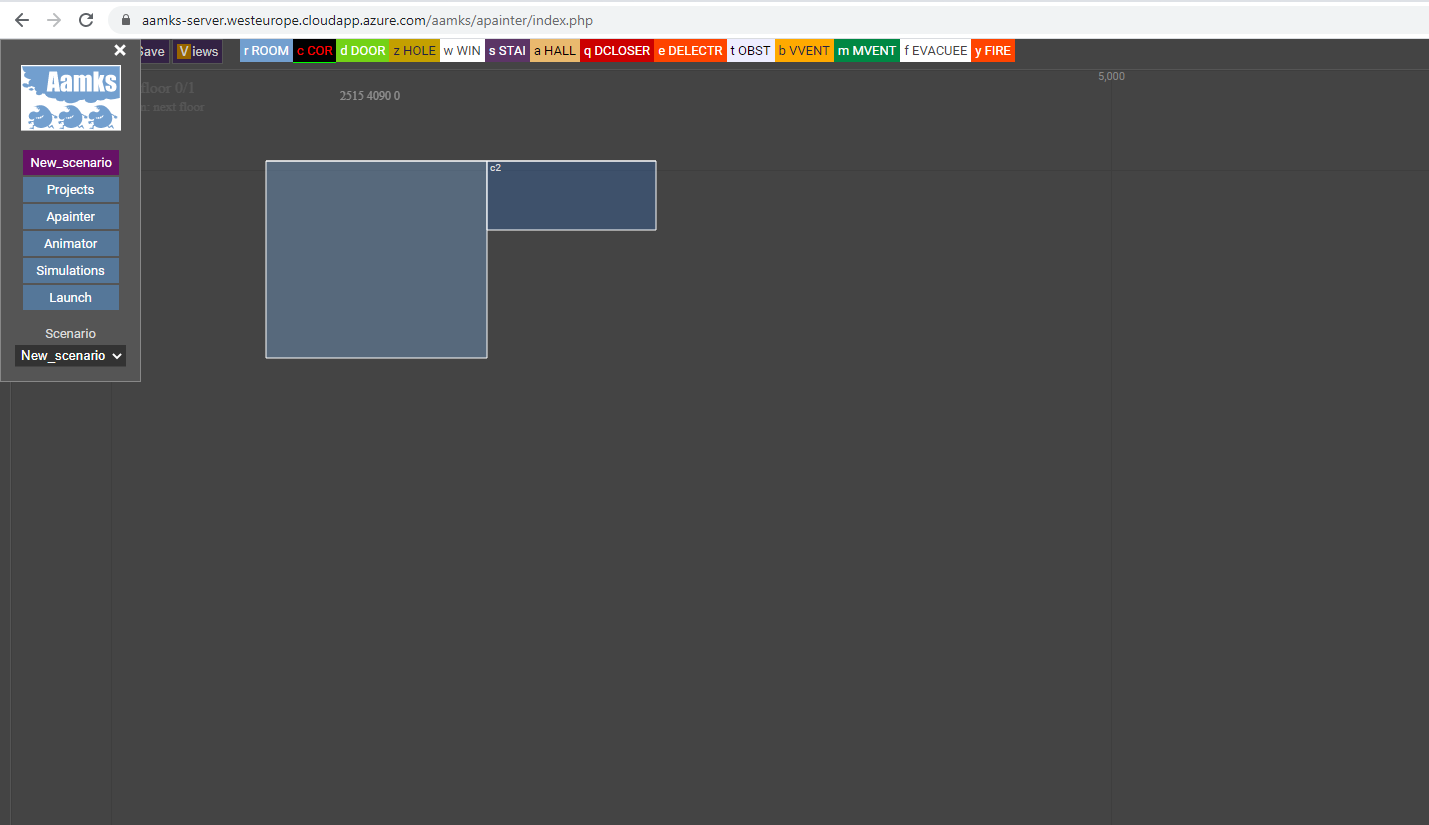
The room and corridor are placed adjacent to each other, but they are not yet connected by an opening. Let’s add a door between them. To add a door, select the “d DOOR” element, or press the “d” key. Click on a point somewhere on the shared line between the room and the corridor:

We have now added a door to connect the room and the corridor, but there’s still no exit from the building. To add an exit, select the door element again and add a door to one of the free edges of the corridor by clicking on a point on the edge:

Our simple geometry is now complete. Remember to save your work by pressing the “Save” button in the top left corner (partially covered by the menu in the above image) or by pressing ctrl+s on your keyboard.
NOTE: There are several common modelling mistakes made by new users which prevent the simulation from working; for a brief list of these scroll down to “Troubleshooting tips” section.
Setting parameters for the scenario
To set the parameters for the simulation scenario, click the name of your scenario on the top of the menu (the purple button). You will be taken to the simulation settings:

The default view of the simulation settings uses the “easy” mode. This is a quick way to give parameters for the simulation. The “advanced” mode gives the user more control over parameters, and the “text” mode allows you to directly edit the simulation script sent to the worker nodes handling the simulation calculation.
CAUTION: the text mode does not tolerate mistakes. Use of text mode is not recommended for beginners. Advanced mode should be sufficient for most users.
Let us go over some of the parameters in the “easy” mode.
Number of simulations: the number of simulation calculations to be run. Set this to 10+ if you want statistical data.
Simulation time: the duration of the simulation in seconds. The default is 100 seconds, meaning Aamks will simulate 100 seconds of evacuation or less if the evacuation is completed before the maximum duration is reached.
Building profile: select the type of building. The parameters management, complexity and alarming change the competence of the agents, with 1 being the most competent and 3 being the least. The building profile impacts agent density i.e. how many agents are randomly placed in a given space in the simulation.
Material: select the material and thickness for the building walls, floors and ceiling. There’s a selection of materials available in the drop-down menus.
Heat detectors: by default there are no heat detectors. These can be added by clicking the button and specifying parameters. Heat detectors enable faster detection of the fire, instead of relying purely on agents detecting the fire. The parameters for heat detectors are the mean and standard deviation of the normally-distributed activation temperature of the detectors in Celsius, the RTI and the probability that any given detector is not broken.
Smoke detectors: by default there are no smoke detectors. These can be added by clicking the button and specifying parameters. Like heat detectors, smoke detectors enable faster detection of the fire. The parameters for smoke detectors are the mean and standard deviation of the normally-distributed obscuration of the detectors in %/m and the probability that any given detector is not broken. NOTE: the first two parameters are named temp_mean and temp_sd; this is a relic of from an earlier version of Aamks.
Sprinklers: parameters for the sprinklers in the building. By default there are sprinklers in the building. If no sprinklers are desired, click on the “sprinklers” button to disable sprinklers. The parameters for sprinklers are the mean and standard deviation of the normally-distributed activation temperature in Celsius, the mean and standard deviation of the normally-distributed activation density, the RTI and the probability that any given sprinkler head is not broken.
NSHEVS: TBA. By default off.
After modifying the parameters to your liking, remember to save the configuration by clicking the “Save” button. Note that ctrl+s does not work here.
Leave the parameters to their default value for now.
Launching your simulation
You are now ready to launch the simulation. To launch the simulation, click the “Launch” button on the left-hand menu. If there are no errors, you will see the following message “X simulations launched”. You will then be taken to the Animator view:

This is the default view of your simulation in Animator. To see whether your simulation is ready, click “Animator” on the main menu. Our simulation is ready and can be selected from the drop-down menu:
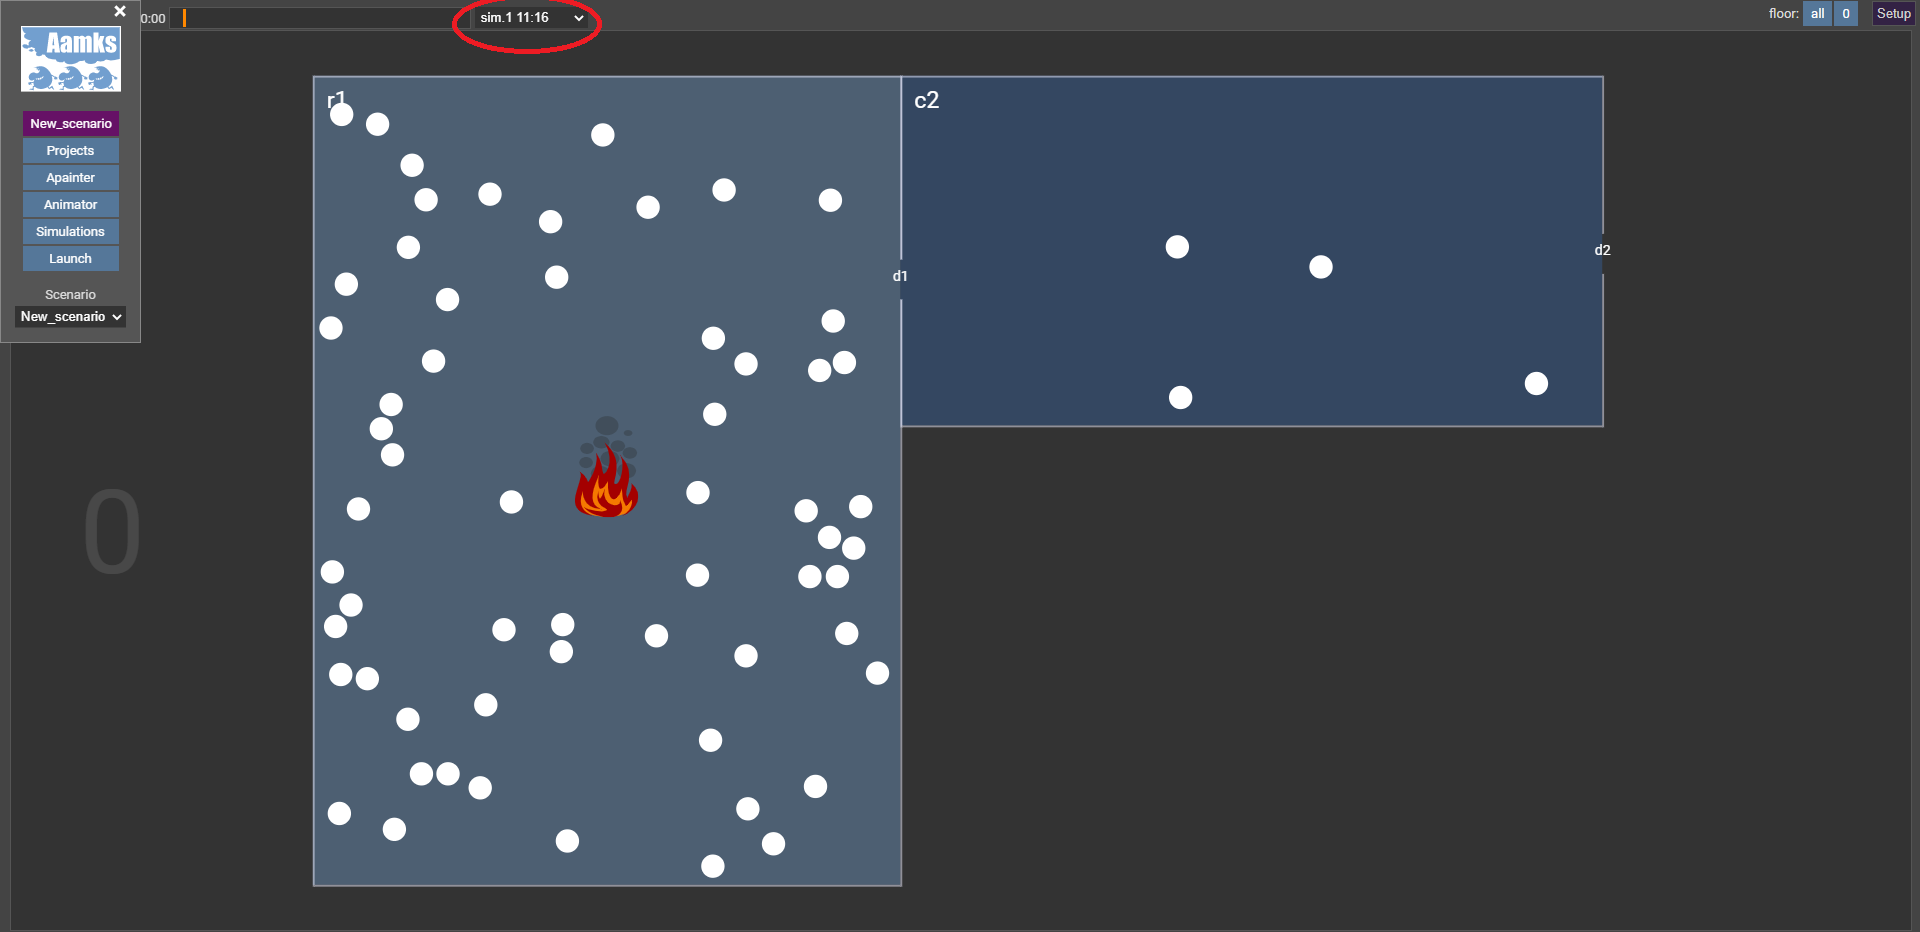
The latest completed simulation animation is automatically playing. To select a certain point in time, click on the highlighted bar:

To stop/start the animation at any time, press the space bar on your keyboard.
IMPORTANT! If your launched simulations haven’t returned any results, DO NOT DELETE the project/scenario! This can lock you out of your Aamks account.
Statistical data
If you have run a statistically significant amount of simulations (more than ten), you can see statistical data by clicking “Simulations” on the main menu:
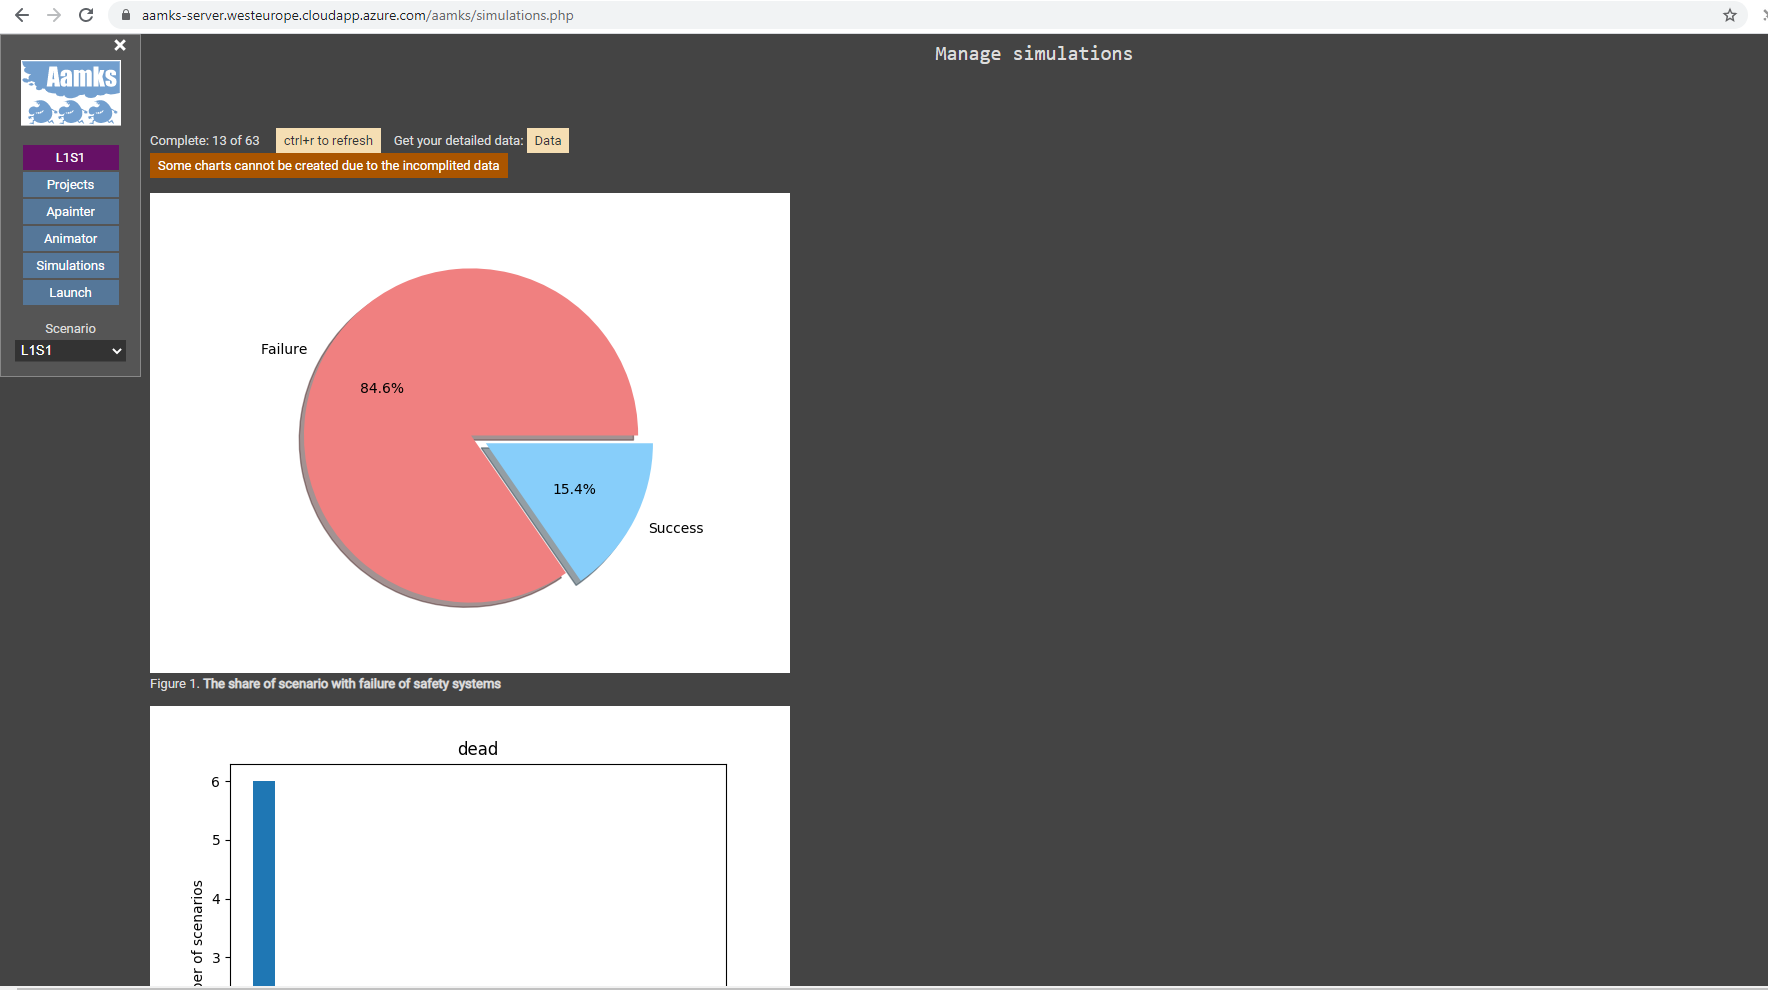
Under simulations, you can find data on casualties, distributions of ASET and RSET, temperature layers, visibility, and event trees.
Logging out
To log out of Aamks, click “Projects” on the main menu, then click “Logout” in the upper right-hand corner.
Helpful features
Saving or exporting/importing geometry
To save or export/import your geometry, go to Apainter. Press ctrl+i on your keyboard, this will take you to the text view of the geometry:

To export your geometry, click on the text field, press ctrl+a to select all, then press ctrl+c to copy the text. Paste it in e.g. Notepad++ and save.
To import your geometry, click on the text field, press ctrl+a to select all, press delete, then paste your geometry into the text field by either clicking the Chrome menu on the top right corner (three vertical dots) and select “Paste”:

NOTE: ctrl+v will NOT work!
Another method is to drag and drop the geometry from e.g. Notepad++: press ctrl+a in Notepad++ to select all, then press and hold the left mouse button and drag the text from Notepad++ to the text field in Aamks, then let go of the mouse button. Save your geometry after importing by clicking “Save” or by pressing ctrl+s.
Saving or exporting/importing simulation parameters
Similarly to exporting/importing geometry, you can export/import the simulation parameters. To do this, go to your scenario settings and change the view from “easy”/”advanced” to “text”. Copy and paste works the same way for the simulation text field as for the geometry. Remember to save your simulation after importing by clicking on “Save” (pressing ctrl+s will not work).
Apainter additional features
To see element coordinates, right-click on an element:
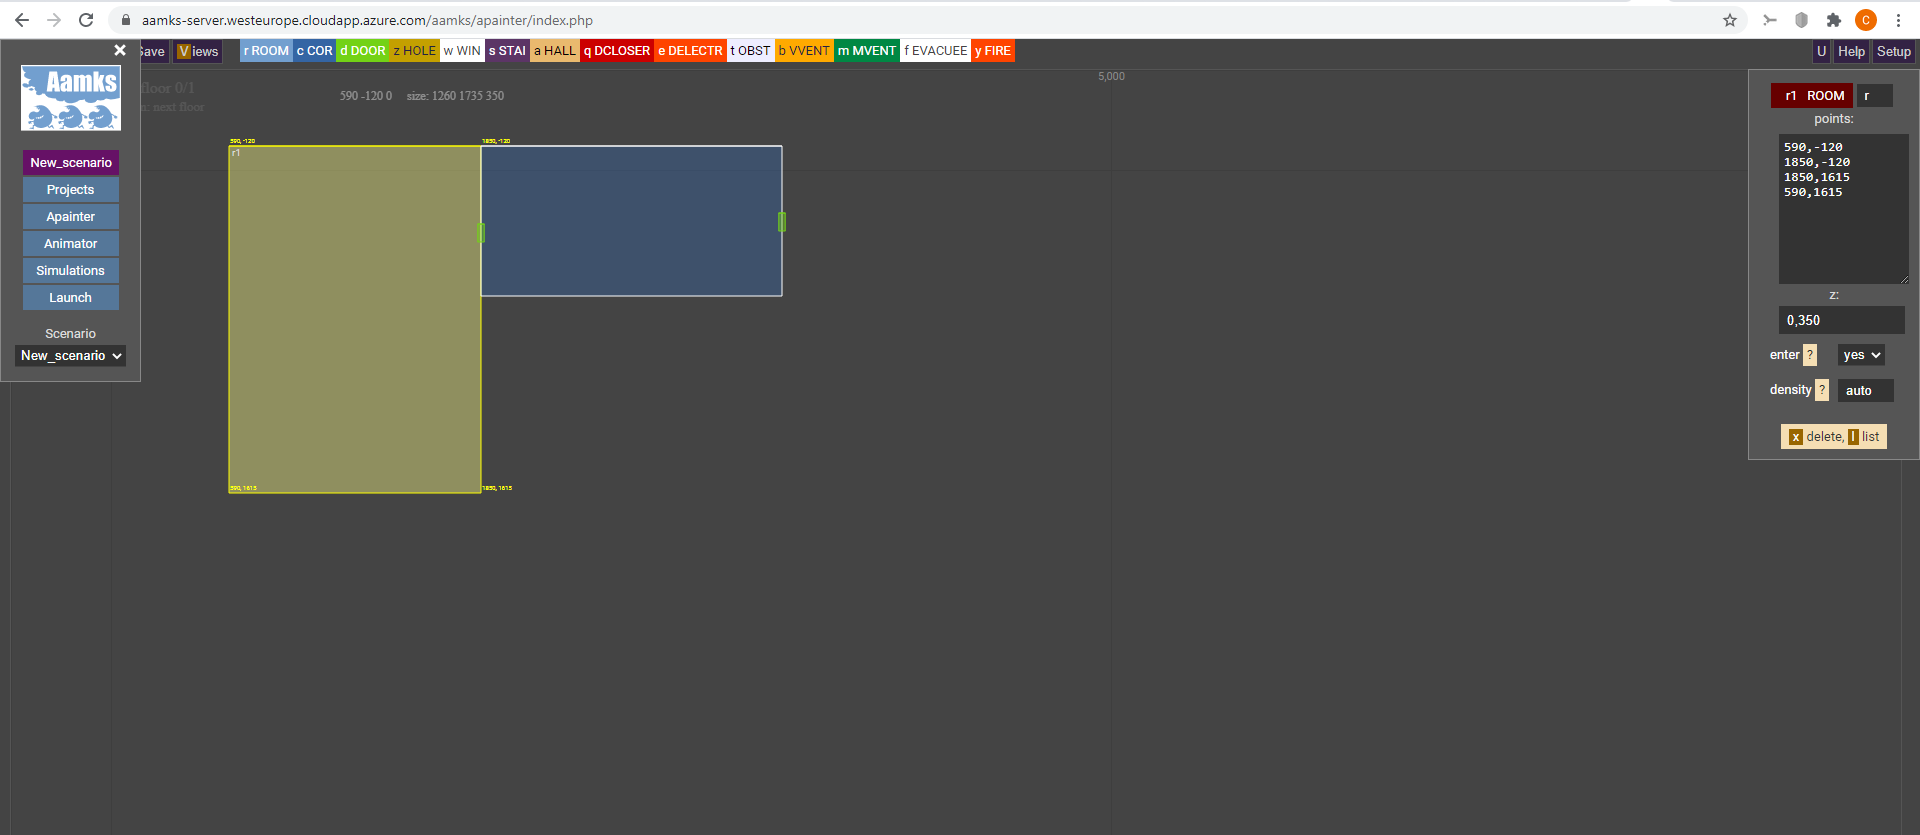
The selected element will be highlighted and its properties will be shown on the right side. The coordinates are the numerical values listed in the text box; you can adjust the size and position of the element by adjusting these values. The first number in the number-pairs is the x-coordinate, the second is the y-coordinate. The z-coordinate is below them and it is uniform for the element. The additional parameters for space elements define whether agents can enter the space and density of agents i.e. how many agents are placed in a space.
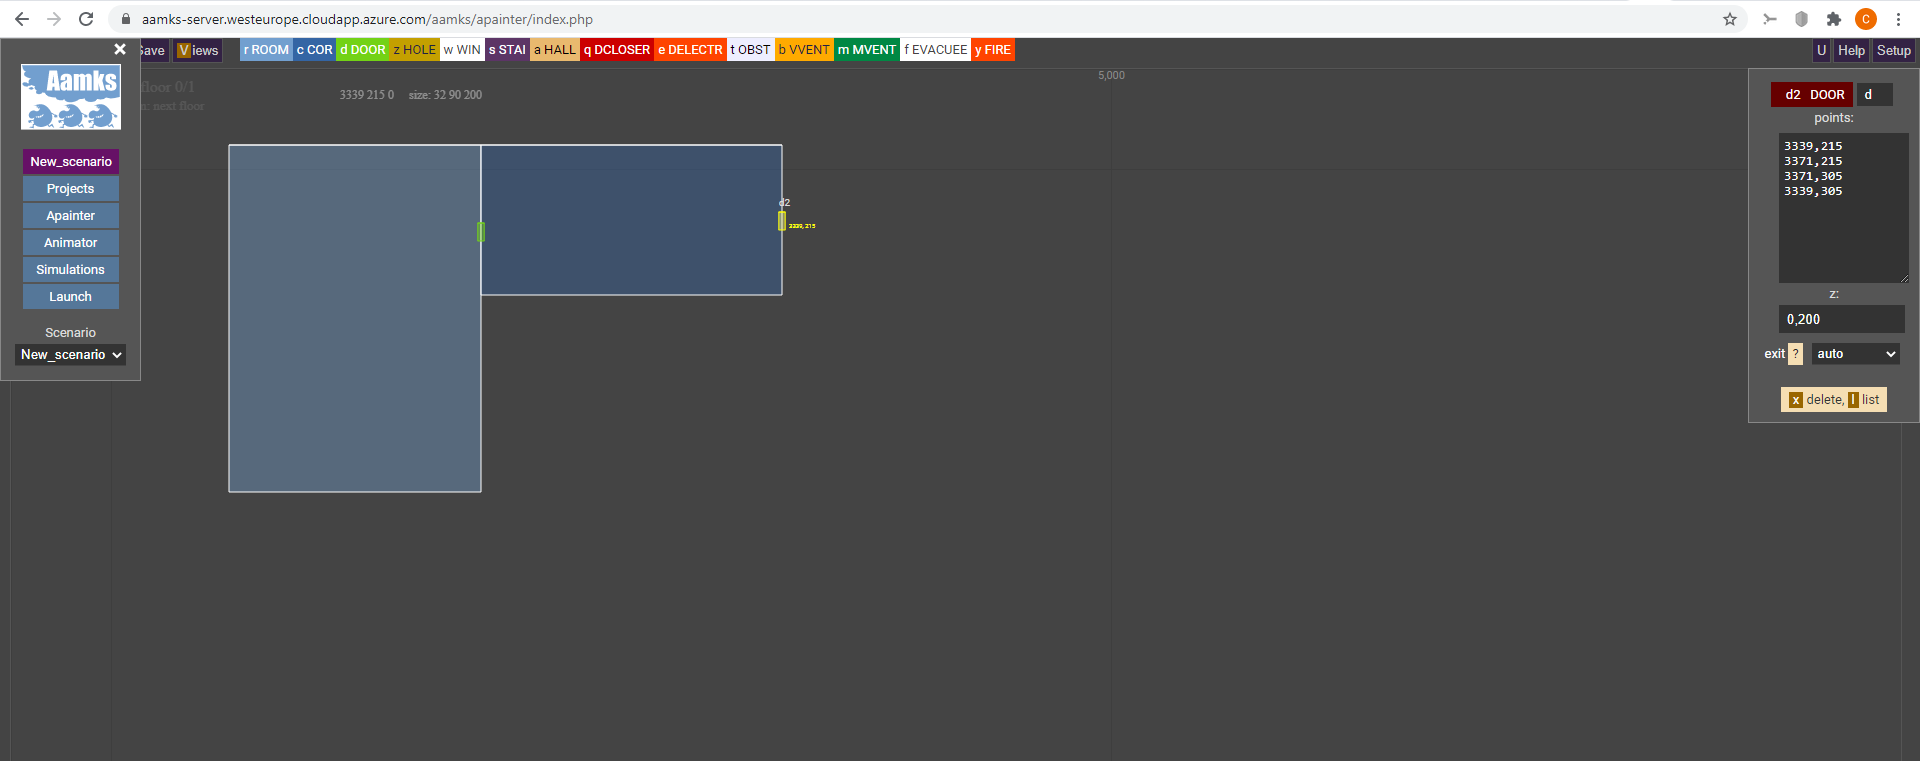
Doors have a different additional parameter; this determines whether agents know the specified door can be used to exit the simulation. The “auto” setting means all agents know this door to be an exit, while primary and secondary limit knowledge of the door as an exit. This feature is useful if there are emergency exits known only to staff members of a given building for example.
To delete elements, right-click them and press “x” on your keyboard.
If you are modelling a multi-floor building, add a new floor to the simulation by clicking the “Setup” button in the upper right-hand corner:
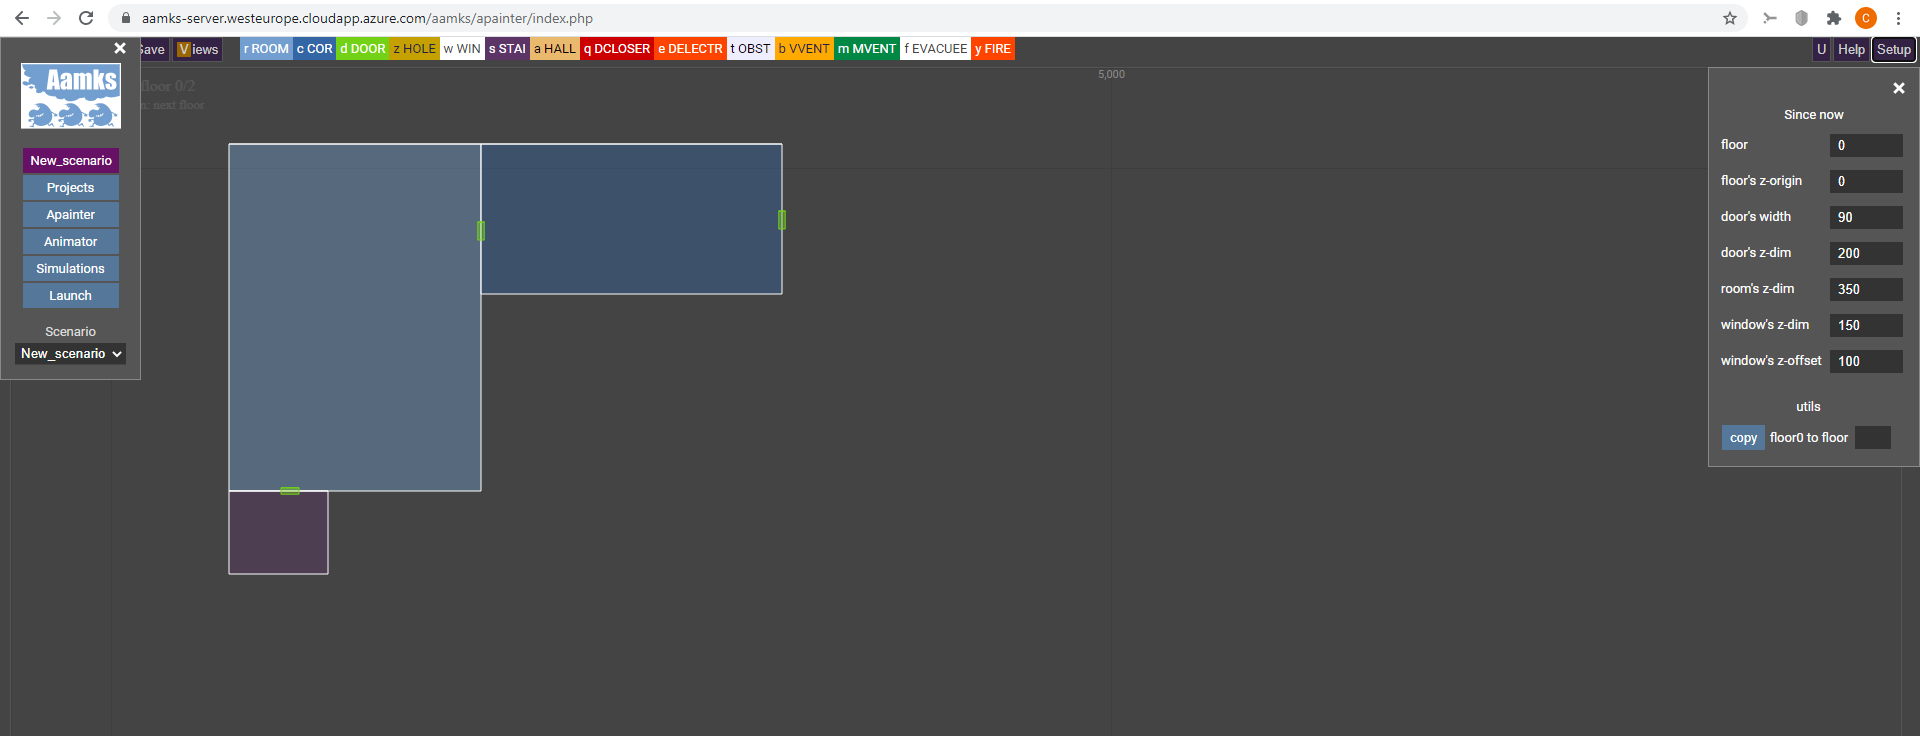
Under utils, enter a floor number and press copy, this will copy the current floor’s geometry to the floor number specified. The default ground floor is zero, so the next logical floor is 1. To switch the view between floors, press “n” on your keyboard. To connect the floors, use a staircase element placed at the exact same coordinates on all floors.
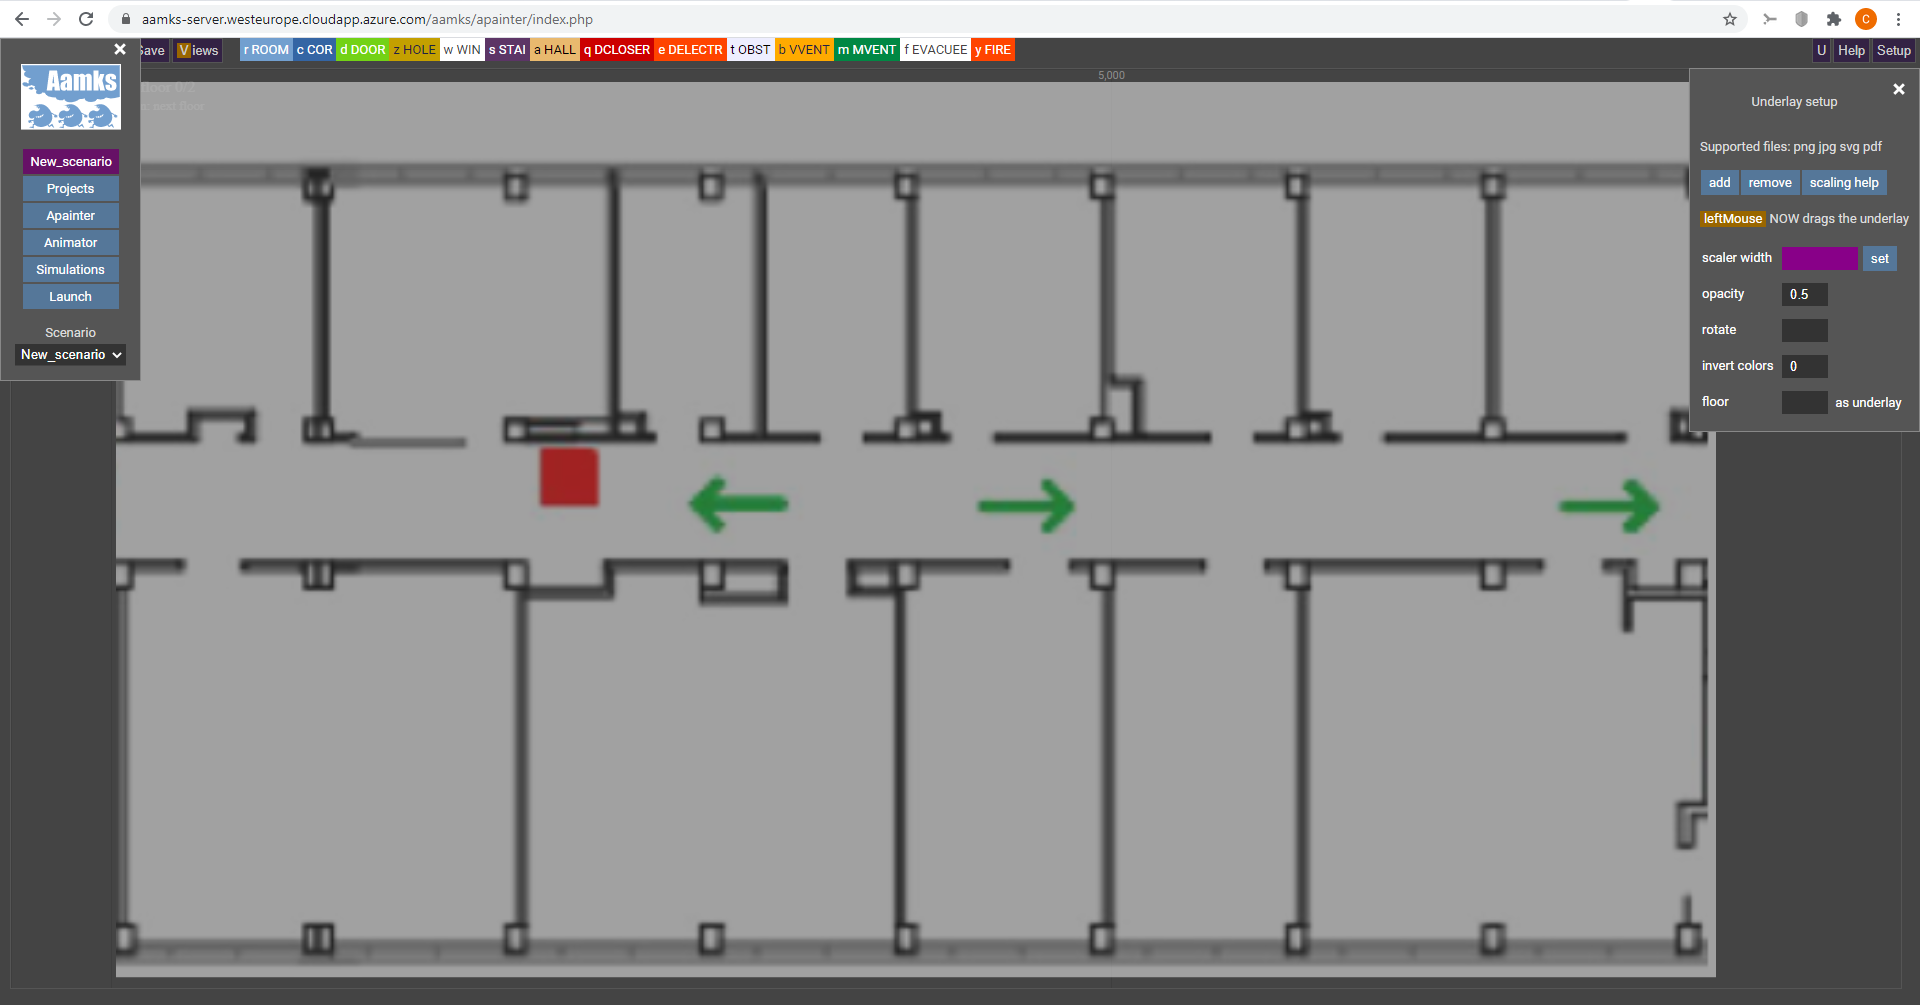
To use an existing building’s drawings to for modelling, click “U” in the upper right-hand corner:

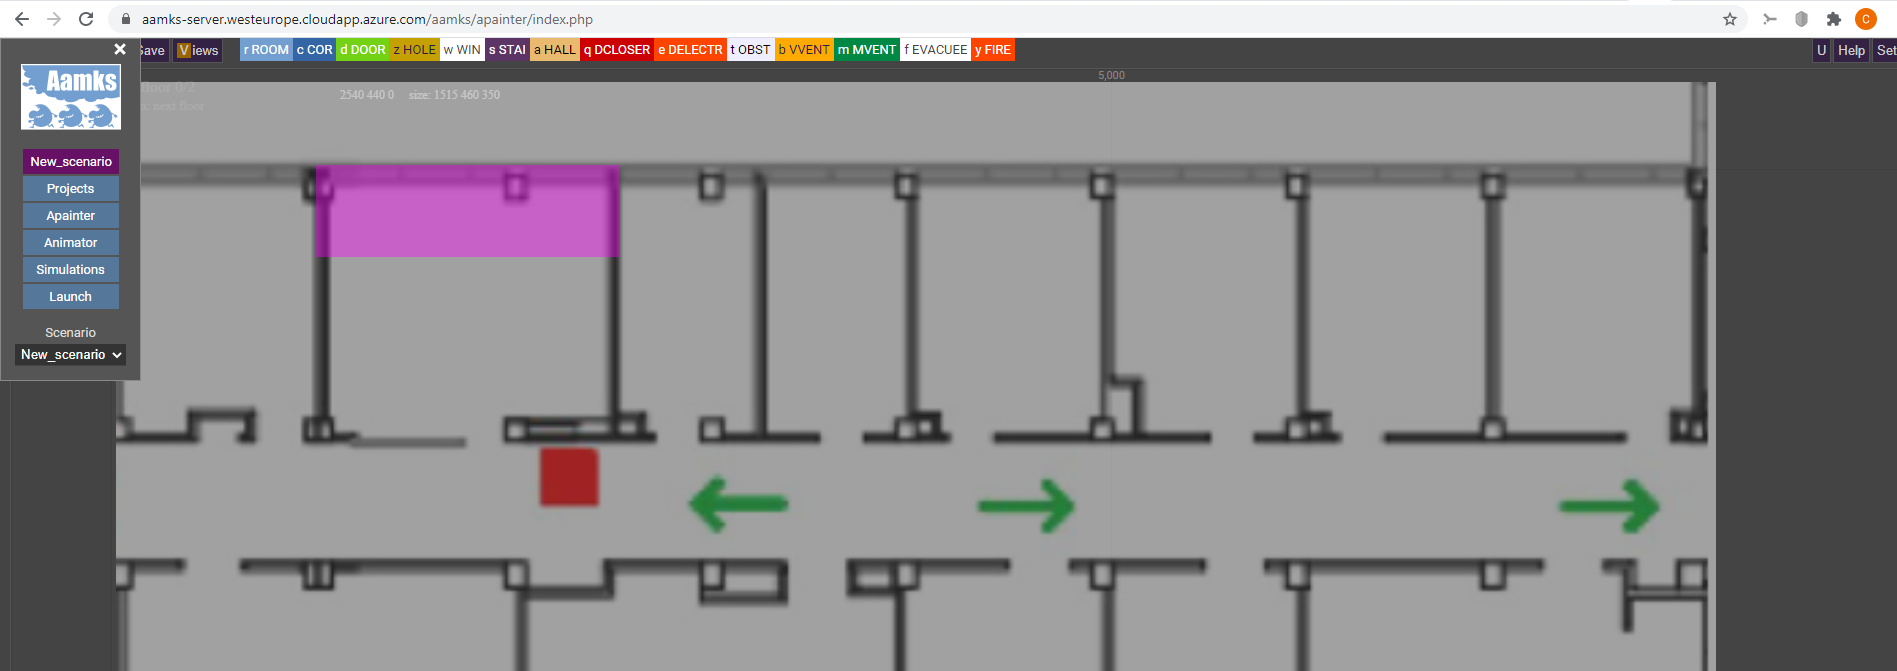
Click add. This will allow you to add a file to be used as an underlay to guide modelling. Select a file from your computer and click “Open”. The file will be added as an underlay to the workspace:
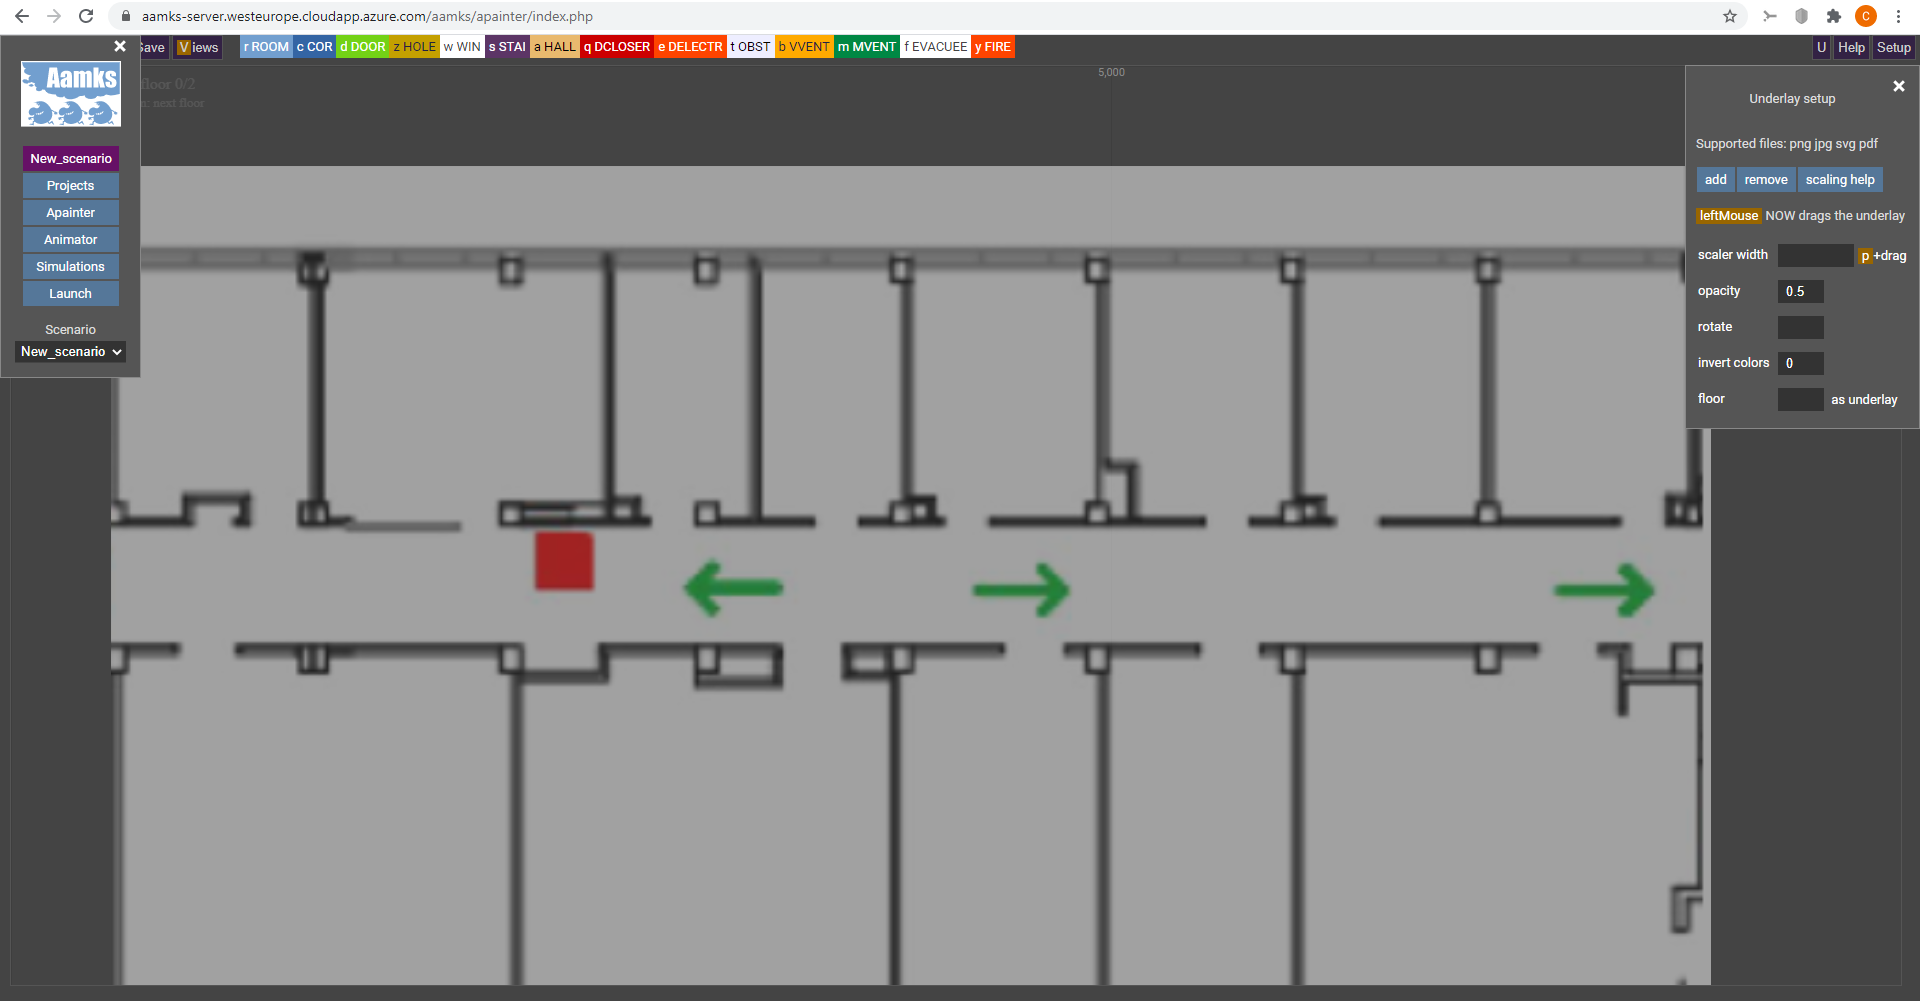
You can move your underlay by dragging it: press and hold the left mouse button on the underlay and move it.
Now we need to scale it. You need to know the measurement of a horizontal feature such as the length of a wall from your underlay. Then, press “p” on your keyboard. Now, press and hold on a point at one end of the feature to be used for scaling, then move the cursor until the scaling rectangle’s horizontal length matches the length of your chosen horizontal feature:
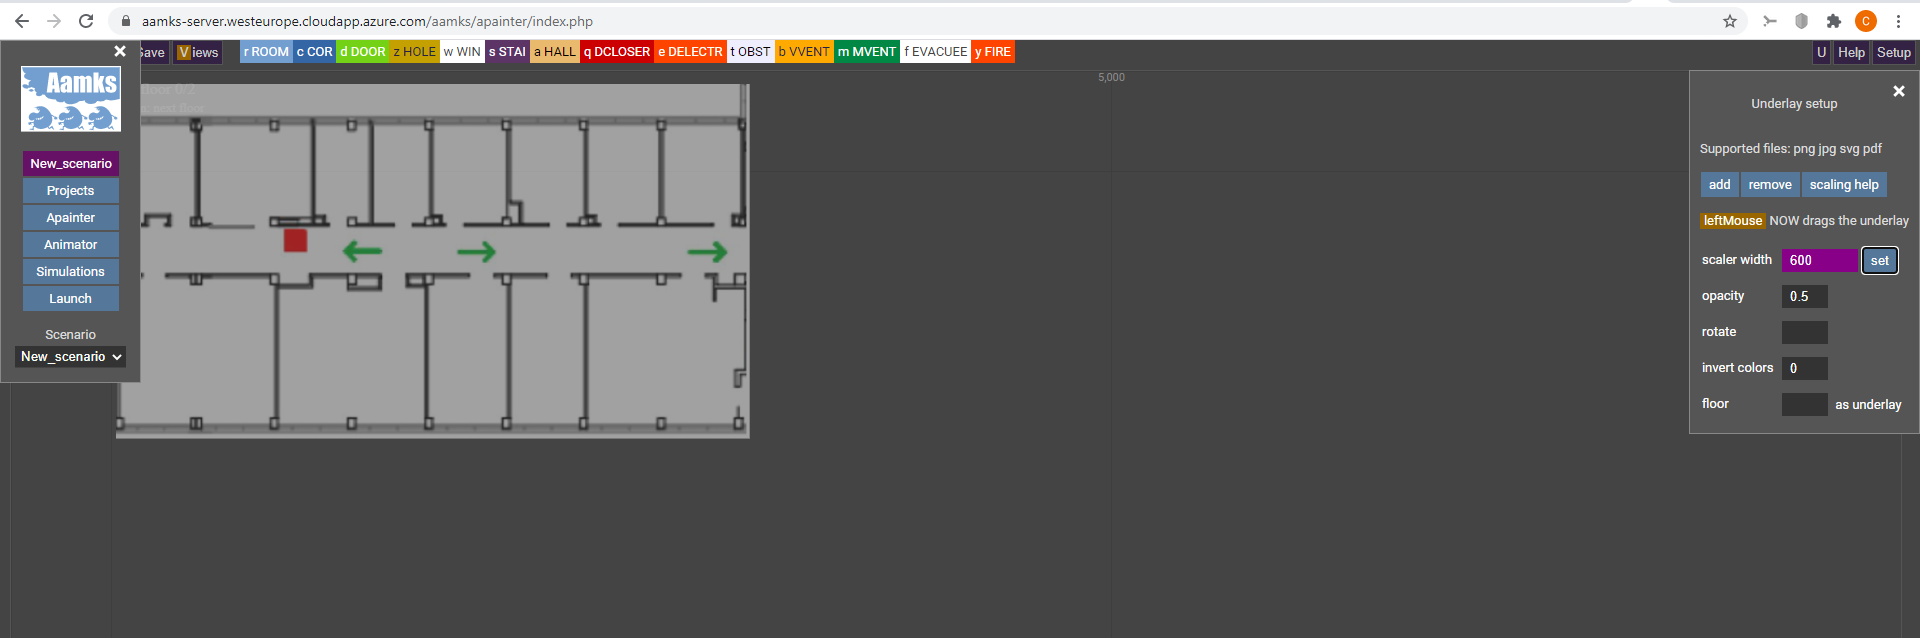
Then, enter the length of the feature in centimeters in the “scaler width” field and click set:
You have now scaled Apainter to match your underlay’s measurements:
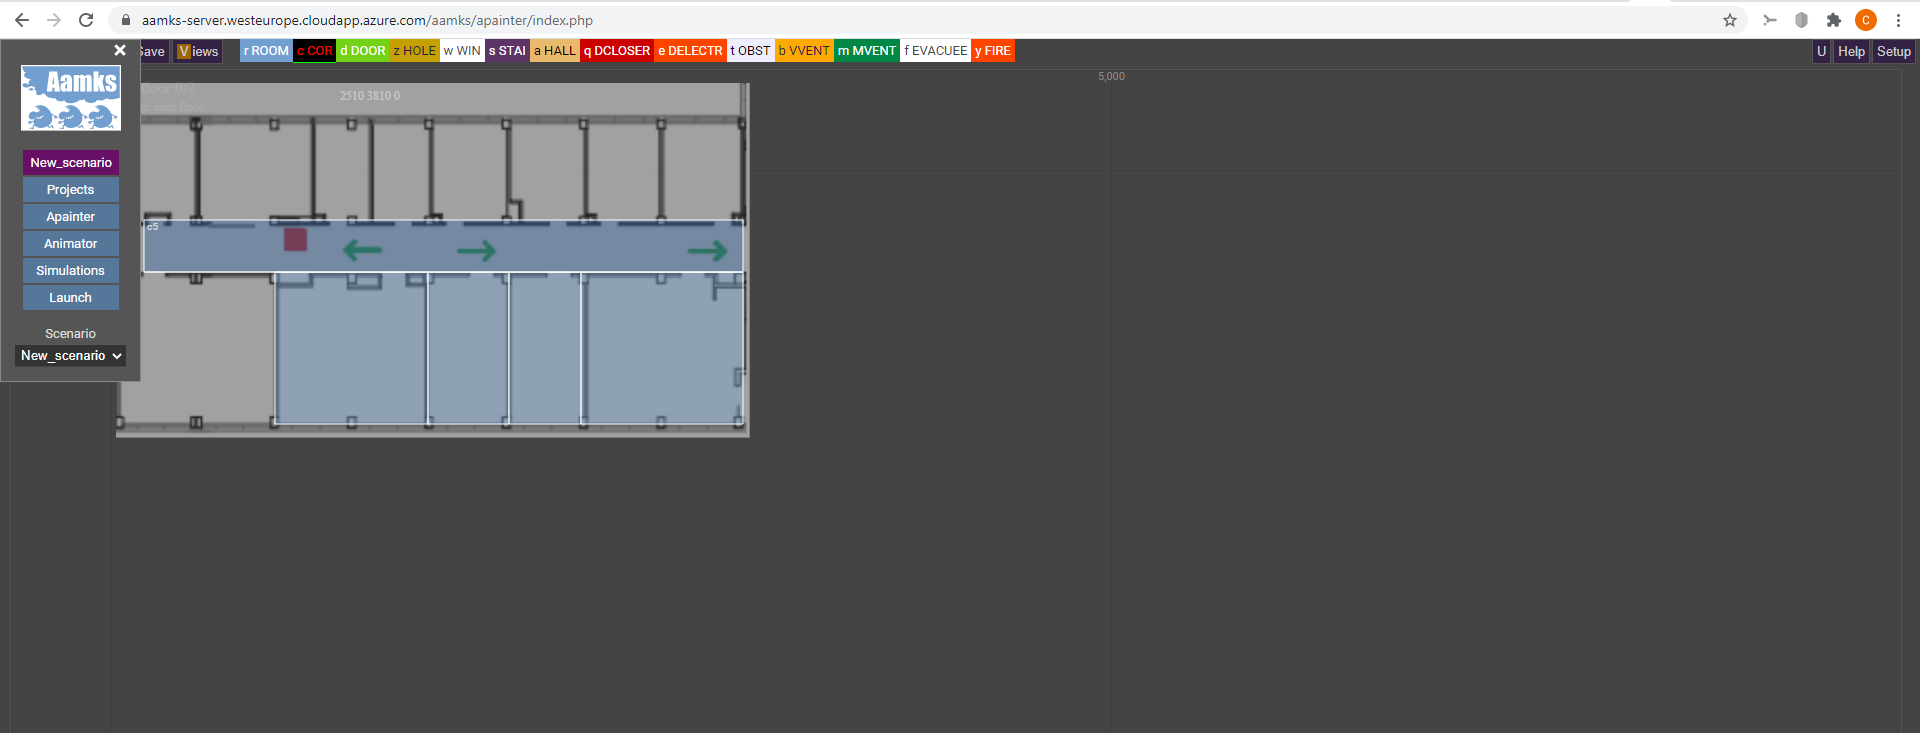
You can now add rooms matching the underlay’s room plan and the rooms will have the correct dimensions:
To remove the underlay, click “U” and click “remove”.
To match the underlays of multi-floor buildings, first add the ground floor underlay, scale it and add a staircase. Right-click on the staircase element and adjust its z-coordinate so that it shows on the second floor. Then add the underlay of the second floor and place it so that the staircase placement matches.
Troubleshooting tips
No simulations appear in Animator despite no errors given upon launch:
The simulation has failed on the worker nodes calculating the simulation. There are several possible reasons, here are some usual modelling mistakes:
- Make sure the elements DO NOT have any negative coordinates! All rooms, corridors, etc. should be drawn in the positive area, otherwise there will be problems with the simulations. You can check for negative coordinates by right-clicking any element. This mistake occurs easily when adding the underlay if you move it up or to the left too much.
- No way out of a room. All rooms must have a way for agents to leave, either a door or a hole.
- No exit from the building. If there’s no doors leading out of the building, agents cannot exit and the simulation is stuck. The exit must be a door (i.e. DOOR, DCLOSER, or DELECTR).
- No corridor element. Agents use corridors to calculate the exit route. All models must contain at least one COR.
- Exit placed in a room instead of a corridor or staircase. Presently, all exits from the building must be connected to a corridor element or a staircase. A door leading out of the building directly from a room will not be recognized by agents.
- Agents can’t enter a staircase. In a building containing multiple floors, agents must enter a staircase through a door. A HOLE is not valid, as agents can’t then find the staircase.
- Elements intersect. Elements cannot intersect with each other. Special elements, such as doors and holes must connect a maximum of two spaces, e.g. you cannot connect three rooms to a single corridor via a single HOLE, rather each room must have a separate HOLE connecting it to the corridor.
- Duplicate elements on top of each other. Similar to nr. 5, sometimes two elements are placed on top of each other if deletion of one element fails. To see all elements of a given type, right-click on an element in Apainter, then press “l” on your keyboard. This will list all elements of the selected type. Highlight each one by hovering the cursor on the id of the element in the list and check whether there are duplicates/overlapping ones. Delete a highlighted element by pressing “x” on your keyboard.
If the geometry is correct but no simulations appear, there may be a problem on the worker nodes preventing simulations. Contact people in charge of Aamks maintenance and management; in Aalto University this is typically the lecturer and assistants of the relevant course.
Additional modelling tips
If you decide to add smoke detectors to a model, the parameters “temp_mean” and “temp_sd” are not the activation temperature mean and standard deviation; they are activation obscuration mean and standard deviation (unit is %/m); the names are misleading and are remnants from an older version.
The heat of combustion parameter “heatcom” is specified in the “advanced” view in two different places; only by changing the values of the lower/latter “heatcom” will changes be applied. Alternatively, you can adjust the parameter in the “text” view. Remember to save your changes.
In the version of Aamks used by Aalto, there is a mistake with the “heatcom” parameter. The “heatcom” values’ unit should be kJ/kg but they actually are J/kg, as a consequence the heat of combustion passed to simulation is 1/1000th of the intended value. To rectify, simply add three zeros to the default values.
In the version of Aamks used by Aalto, there is a mistake with the implementation of heat detectors which causes simulations to fail. Before Aamks is updated, it is suggested that smoke detectors are used instead of heat detectors.
No figures are shown when clicking “Simulations” on the main menu:
There is an insufficient number of simulations to generate figures. Run at least ten simulations.